Sunday, 24 April 2011

Too Hot For Chocolate?

Do you get influenced by movies? I do. Some characters are so compelling, interesting and adoring, how could I not want to be just like them? And honestly, a part of me feels like that some of these fictional people are simply another side of me. Is it any wonder there is an instant feeling of familiarity and ease when viewing them on the big screen?
After watching The Horseman on the Roof I dyed most of my clothes blue and ate nothing but toast with honey for weeks. Le Double Vie de Véronique sent me on a life-long quest in search of a see-through rubber ball that, when looking through it, turns the world up side down. (I still haven’t found one). Bringing up Baby left me longing for a pet leopard and Cary Grant, not to mention Katharine Hepburn’s wardrobe. Claude Lelouch’s masterpiece, La Belle Histoire, truly surprised me. All of a sudden I wanted to be a bee-keeper, just like Marie. Great movies are like that, they unravel different, hidden, unknown sides of us. Of course I’m not taking about a regular bee-keeper here. The beautiful Marie was also an amazing teacher and had known Jesus as a child. In a previous life, but still. Marie and I even have the same colour hair, but could I overcome my fear of bees?
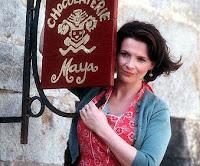
Now, you can only imagine the effect the movie Chocolat had one me. This movie confirmed what I already knew to be true. That chocolate is magical, irresistible, and sometimes life-changing. Vianne and her chocolate shop, what a dream. A dream that is a bit more realistic than owning a farm in Africa or running around in a copper bikini, at least in my case. However, I can totally picture opening up a chocolate shop in the country. What a treat that would be.    

Today I’m making chocolate mousse. It’s simply too hot to deal with batter, frosting and ovens. I also don’t have the patience to make truffles. Chocolate mousse is so quick to prepare. Just make, scoop and chill. See, today the sun is actually shining and there is not a single cloud in the sky. I’ve made a big pitcher of chilled jasmine tea, the picnic blanket is washed and ready, and I have a stack of books to read. However, I know when the evening comes, and it’s time to put on a cashmere cardigan and light some candles, I’ll be happy there is a delicious mousse waiting in the fridge. It’s the perfect way to end a perfect day.  

Milk Chocolate Mousse

250 g milk chocolate cut in small pieces
3 eggs
60 gram sugar
2, 5 dl whipping cream

Melt the chocolate over very low heat, stir now and then. When it’s all melted and shiny, set aside to chill.

Whip cream with an electric mixer. (I’ll say it again; Kenwood makes the best kitchen appliances). Whipping cream is easy, but if you whip the cream for too long it actually turns into butter. So just watch it, stop when its light and fluffy.

Now we need to whip the eggs and sugar until pale and air-light. This takes about 10-15 minutes. Unlike the cream, there is no such thing as mixing the eggs for too long. If you don’t have two mixing bowls, just scrape out the cream into another bowl and put it in the fridge. Wash the mixing bowl squeaky clean and dry it really well before putting the eggs in it. If there is any moisture left in the bowl, the eggs won’t mix the way you want. You will be left with a runny, yellow mix. This would be perfect for pancakes, not so great for mousse.  Just keep in mind what you are making while preparing the ingredients for it. Mousse is light, so everything we put in it must be light as well. Does that make sense?

When the eggs are ready, fold the melted chocolate in with the egg-mixture. Use a rubber spatula or a big, flat spoon. If you whisk or stir too quickly, the eggs will loose its lovely fluffiness.

When that is all blended together, fold in the whipped cream.

The last step is to pour the mousse into dessert bowls. It always looks really nice in wine glasses, or even in a big, clear dessert bowl. Whatever you have will do. Leave it in the fridge for minimum 2 hours. Serve with a sprinkle of chocolate, a mint leaf and fresh berries on the side.

Are there any questions?


Sunday, 3 April 2011

The Proposal

I had made a chocolate glazed pecan torte for a friend’s dinner party. It felt like a nice thing to bring, certainly more original than a bottle of wine. Also, this would ensure we all got something sweet after the main meal. I’m always astonished when people invite you over for dinner, make this elaborate feast, and then casually skip dessert and go straight to serving coffee. What is that all about? If the coffee was accompanied by a delicate truffle, that would have been one thing. I don’t need a massive piece of cake to be happy, but I always feel that a  meal should be rounded off by something sweet, soft, delicate and intriguing. (I was at a wedding once when there was only one cake, for over 60 guests. Why?)
For most people this might not even be an issue, I recognize that. And its not like I always feel like having dessert myself. I just prefer to have the option, like with most tings in life.
So we had all finished eating dinner, and my friend brought in the torte. The man sitting next to me helped himself to a big piece. (This is always a good sing.) After he took his first bite, he paused, and then he turned to me and said: “Will you marry me?”  

Who said the way to a man’s heart was not through his stomach?

This torte has it all, and behold dear friend, its not a layer cake, so its quite easy to decorate and frost. I say quite, because you still need to know what you are doing. But don’t you worry, this torte is so tasty that even if it ended up looking like an upside down ant-hill, people would still line up to get a taste.

Chocolate Glazed Pecan Torte

170 g dark chocolate cut into pieces
170 g butter, also cut into pieces
4 eggs, separated
½ cup Demerara sugar (regular white will also do)
1/3 cup icing sugar
1 cup ground pecans
2 tablespoons flour
A pinch of cream of tartar

Preheat the oven to 350º and line the bottom of a 9-inch cake pan with baking paper.
Get out a saucepan and fill it halfway with water. Bring it to a boil, then reduce to simmer. Now fetch a heat-resistant bowl and place it in the simmering water. Put chocolate and butter in the bowl and leave it there until melted. Stir carefully until its well blended. Set aside.

While the chocolate is melting away, whip egg yolks with Demerara sugar until its pale and thick. Then stir in the warm chocolate mixture, ground pecans and flour. Set aside.

You then beat egg whites with cream of tartar, on low speed, until soft peaks form. Increase the speed and gradually add icing sugar. (I prefer using icing sugar when beating egg whites. Its lighter, so it doesn’t cause the lovely peaks to collapse.) Keep beating until the whites are stiff, but not dry.

Mix about one quarter of the egg whites in with the chocolate mixture. Blend well. This little step lightens the chocolate batter so it’s easier to fold in with the remaining egg whites.
I say fold, because if you beat or mix the egg whites, they will break.  
If you need some guidance on how to do this correctly, check out this link: http://www.youtube.com/watch?v=ncSTNoU4nn4 
Working with egg whites is not difficult, but its crucial that you fold them with patience and joy.
So you fold the remaining egg whites in with the chocolate mix, then pour it all into the prepared pan.

Bake for about 40-45 minutes. We all have different ovens that treat our baked goods accordingly, so check your torte after 30 minutes. Its done baking when you insert a toothpick into the middle of the torte and it comes out with soft, moist crumbs.

When done baking, put the pan on a cooling rack and leave it there until cooled down.

Sometimes the torte will fall in the centre, leaving a higher rim of cake around the sides. This is easily fixed by levelling the cake. This is how its done:
While the cake is still in the pan, run a knife along the edge of the pan to release the side. Then gently press the raised edges down with your fingers. Release the side of the pan and invert the cake so that the top becomes the bottom. Remove the bottom of the pan and the baking paper.

If your cake did not fall (great!), run a knife between the cake and the side of the pan to release it. Remove the side of the pan and invert the cake so that the top becomes the bottom. Remove the bottom of the pan and the baking paper. 
Its the same instructions as before, just no levelling.
Your cake is now ready to be decorated, but first we must make the glaze.

Chocolate Glaze

250 g milk or dark chocolate, cut into tiny bits
¾ whipping cream
1 tablespoon corn syrup
(1-2 cups icing sugar)

I put the icing sugar in parenthesis because it’s not part of the glaze recipe per se, but you need it for the decorating part. You’ll see.

Place the chocolate in a bowl and set aside. Bring cream and syrup to a simmer and then pour it over the chocolate. Stir until its perfectly smooth and until all the chocolate is melted. Do you now see why it’s called a glaze? It’s really shiny, like the chocolate has been polished. Take out 2 tablespoons of glaze and set it aside for later.

Glaze likes to be poured, not spread. Any attempt to re-smooth an already poured glaze will leave dull looking marks and streaks. We are going for the even look, like the torte has been dipped in glaze. 
First you spread a thin layer of glaze over the cake in order to smooth the surface. (With a frosting knife of course….)  This will fill in invisible cracks and seal in any loose crumbs before the final coat of glaze is poured over the cake. Think of it as spackling a wall before painting it.
Pour the rest of the glaze in a puddle in the centre of the torte. Spread it evenly over the top (again, with your frosting knife) so it runs over the sides. This is easiest done if you have a lazy Susie or a turn table. If not, just turn your cake platter while you spread the glaze. 2-3 strokes should do it.
If you have any bare spots on the side, scoop up excess glaze and cover them up.   

You might want to call it a day here, and there is no shame in doing so. However, if you want a marbled look, keep going.

Mix one cup of icing sugar with some of the glaze you set aside earlier. The mixture should be smooth with the consistency of melted chocolate. Add more glaze or sugar as needed. If it’s too thick, add a teaspoon of water.
This mix will be slightly lighter in colour than the original glaze, as it should be. Put the mix in a piping bag, or a regular zip-lock back, and cut a tiny whole in one of the corners. It should come out in a thin line. With a steady hand, draw a spiral pattern on the torte, starting from outside in. You then take a needle, or the tip of a sharp knife, and draw it through the spiral piping from the centre of the cake out to the edges. Voila! You have yourself a marbled torte.

As you can see from the pictures, I had some extra icing-sugar mix left, so I added that to the torte as well. You will also notice that I cut the whole in my piping bag a too big, so the spiral pattern oozed out a bit. It’s still divine though, not to mention scrumptious

If anything is unclear, or if you have any questions, feel free to ask.
As you might have figured out by now, I love talking about baking.