Sunday, 24 April 2011

Too Hot For Chocolate?

Do you get influenced by movies? I do. Some characters are so compelling, interesting and adoring, how could I not want to be just like them? And honestly, a part of me feels like that some of these fictional people are simply another side of me. Is it any wonder there is an instant feeling of familiarity and ease when viewing them on the big screen?
After watching The Horseman on the Roof I dyed most of my clothes blue and ate nothing but toast with honey for weeks. Le Double Vie de Véronique sent me on a life-long quest in search of a see-through rubber ball that, when looking through it, turns the world up side down. (I still haven’t found one). Bringing up Baby left me longing for a pet leopard and Cary Grant, not to mention Katharine Hepburn’s wardrobe. Claude Lelouch’s masterpiece, La Belle Histoire, truly surprised me. All of a sudden I wanted to be a bee-keeper, just like Marie. Great movies are like that, they unravel different, hidden, unknown sides of us. Of course I’m not taking about a regular bee-keeper here. The beautiful Marie was also an amazing teacher and had known Jesus as a child. In a previous life, but still. Marie and I even have the same colour hair, but could I overcome my fear of bees?
Now, you can only imagine the effect the movie Chocolat had one me. This movie confirmed what I already knew to be true. That chocolate is magical, irresistible, and sometimes life-changing. Vianne and her chocolate shop, what a dream. A dream that is a bit more realistic than owning a farm in Africa or running around in a copper bikini, at least in my case. However, I can totally picture opening up a chocolate shop in the country. What a treat that would be.    

Today I’m making chocolate mousse. It’s simply too hot to deal with batter, frosting and ovens. I also don’t have the patience to make truffles. Chocolate mousse is so quick to prepare. Just make, scoop and chill. See, today the sun is actually shining and there is not a single cloud in the sky. I’ve made a big pitcher of chilled jasmine tea, the picnic blanket is washed and ready, and I have a stack of books to read. However, I know when the evening comes, and it’s time to put on a cashmere cardigan and light some candles, I’ll be happy there is a delicious mousse waiting in the fridge. It’s the perfect way to end a perfect day.  

Milk Chocolate Mousse

250 g milk chocolate cut in small pieces
3 eggs
60 gram sugar
2, 5 dl whipping cream

Melt the chocolate over very low heat, stir now and then. When it’s all melted and shiny, set aside to chill.

Whip cream with an electric mixer. (I’ll say it again; Kenwood makes the best kitchen appliances). Whipping cream is easy, but if you whip the cream for too long it actually turns into butter. So just watch it, stop when its light and fluffy.

Now we need to whip the eggs and sugar until pale and air-light. This takes about 10-15 minutes. Unlike the cream, there is no such thing as mixing the eggs for too long. If you don’t have two mixing bowls, just scrape out the cream into another bowl and put it in the fridge. Wash the mixing bowl squeaky clean and dry it really well before putting the eggs in it. If there is any moisture left in the bowl, the eggs won’t mix the way you want. You will be left with a runny, yellow mix. This would be perfect for pancakes, not so great for mousse.  Just keep in mind what you are making while preparing the ingredients for it. Mousse is light, so everything we put in it must be light as well. Does that make sense?

When the eggs are ready, fold the melted chocolate in with the egg-mixture. Use a rubber spatula or a big, flat spoon. If you whisk or stir too quickly, the eggs will loose its lovely fluffiness.

When that is all blended together, fold in the whipped cream.

The last step is to pour the mousse into dessert bowls. It always looks really nice in wine glasses, or even in a big, clear dessert bowl. Whatever you have will do. Leave it in the fridge for minimum 2 hours. Serve with a sprinkle of chocolate, a mint leaf and fresh berries on the side.

Are there any questions?


Sunday, 3 April 2011

The Proposal

I had made a chocolate glazed pecan torte for a friend’s dinner party. It felt like a nice thing to bring, certainly more original than a bottle of wine. Also, this would ensure we all got something sweet after the main meal. I’m always astonished when people invite you over for dinner, make this elaborate feast, and then casually skip dessert and go straight to serving coffee. What is that all about? If the coffee was accompanied by a delicate truffle, that would have been one thing. I don’t need a massive piece of cake to be happy, but I always feel that a  meal should be rounded off by something sweet, soft, delicate and intriguing. (I was at a wedding once when there was only one cake, for over 60 guests. Why?)
For most people this might not even be an issue, I recognize that. And its not like I always feel like having dessert myself. I just prefer to have the option, like with most tings in life.
So we had all finished eating dinner, and my friend brought in the torte. The man sitting next to me helped himself to a big piece. (This is always a good sing.) After he took his first bite, he paused, and then he turned to me and said: “Will you marry me?”  

Who said the way to a man’s heart was not through his stomach?

This torte has it all, and behold dear friend, its not a layer cake, so its quite easy to decorate and frost. I say quite, because you still need to know what you are doing. But don’t you worry, this torte is so tasty that even if it ended up looking like an upside down ant-hill, people would still line up to get a taste.

Chocolate Glazed Pecan Torte

170 g dark chocolate cut into pieces
170 g butter, also cut into pieces
4 eggs, separated
½ cup Demerara sugar (regular white will also do)
1/3 cup icing sugar
1 cup ground pecans
2 tablespoons flour
A pinch of cream of tartar

Preheat the oven to 350º and line the bottom of a 9-inch cake pan with baking paper.
Get out a saucepan and fill it halfway with water. Bring it to a boil, then reduce to simmer. Now fetch a heat-resistant bowl and place it in the simmering water. Put chocolate and butter in the bowl and leave it there until melted. Stir carefully until its well blended. Set aside.

While the chocolate is melting away, whip egg yolks with Demerara sugar until its pale and thick. Then stir in the warm chocolate mixture, ground pecans and flour. Set aside.

You then beat egg whites with cream of tartar, on low speed, until soft peaks form. Increase the speed and gradually add icing sugar. (I prefer using icing sugar when beating egg whites. Its lighter, so it doesn’t cause the lovely peaks to collapse.) Keep beating until the whites are stiff, but not dry.

Mix about one quarter of the egg whites in with the chocolate mixture. Blend well. This little step lightens the chocolate batter so it’s easier to fold in with the remaining egg whites.
I say fold, because if you beat or mix the egg whites, they will break.  
If you need some guidance on how to do this correctly, check out this link: http://www.youtube.com/watch?v=ncSTNoU4nn4 
Working with egg whites is not difficult, but its crucial that you fold them with patience and joy.
So you fold the remaining egg whites in with the chocolate mix, then pour it all into the prepared pan.

Bake for about 40-45 minutes. We all have different ovens that treat our baked goods accordingly, so check your torte after 30 minutes. Its done baking when you insert a toothpick into the middle of the torte and it comes out with soft, moist crumbs.

When done baking, put the pan on a cooling rack and leave it there until cooled down.

Sometimes the torte will fall in the centre, leaving a higher rim of cake around the sides. This is easily fixed by levelling the cake. This is how its done:
While the cake is still in the pan, run a knife along the edge of the pan to release the side. Then gently press the raised edges down with your fingers. Release the side of the pan and invert the cake so that the top becomes the bottom. Remove the bottom of the pan and the baking paper.

If your cake did not fall (great!), run a knife between the cake and the side of the pan to release it. Remove the side of the pan and invert the cake so that the top becomes the bottom. Remove the bottom of the pan and the baking paper. 
Its the same instructions as before, just no levelling.
Your cake is now ready to be decorated, but first we must make the glaze.

Chocolate Glaze

250 g milk or dark chocolate, cut into tiny bits
¾ whipping cream
1 tablespoon corn syrup
(1-2 cups icing sugar)

I put the icing sugar in parenthesis because it’s not part of the glaze recipe per se, but you need it for the decorating part. You’ll see.

Place the chocolate in a bowl and set aside. Bring cream and syrup to a simmer and then pour it over the chocolate. Stir until its perfectly smooth and until all the chocolate is melted. Do you now see why it’s called a glaze? It’s really shiny, like the chocolate has been polished. Take out 2 tablespoons of glaze and set it aside for later.

Glaze likes to be poured, not spread. Any attempt to re-smooth an already poured glaze will leave dull looking marks and streaks. We are going for the even look, like the torte has been dipped in glaze. 
First you spread a thin layer of glaze over the cake in order to smooth the surface. (With a frosting knife of course….)  This will fill in invisible cracks and seal in any loose crumbs before the final coat of glaze is poured over the cake. Think of it as spackling a wall before painting it.
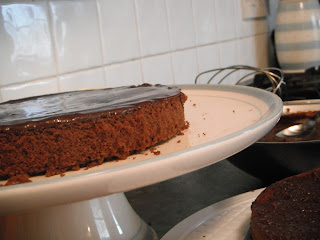
Pour the rest of the glaze in a puddle in the centre of the torte. Spread it evenly over the top (again, with your frosting knife) so it runs over the sides. This is easiest done if you have a lazy Susie or a turn table. If not, just turn your cake platter while you spread the glaze. 2-3 strokes should do it.
If you have any bare spots on the side, scoop up excess glaze and cover them up.   

You might want to call it a day here, and there is no shame in doing so. However, if you want a marbled look, keep going.

Mix one cup of icing sugar with some of the glaze you set aside earlier. The mixture should be smooth with the consistency of melted chocolate. Add more glaze or sugar as needed. If it’s too thick, add a teaspoon of water.
This mix will be slightly lighter in colour than the original glaze, as it should be. Put the mix in a piping bag, or a regular zip-lock back, and cut a tiny whole in one of the corners. It should come out in a thin line. With a steady hand, draw a spiral pattern on the torte, starting from outside in. You then take a needle, or the tip of a sharp knife, and draw it through the spiral piping from the centre of the cake out to the edges. Voila! You have yourself a marbled torte.

As you can see from the pictures, I had some extra icing-sugar mix left, so I added that to the torte as well. You will also notice that I cut the whole in my piping bag a too big, so the spiral pattern oozed out a bit. It’s still divine though, not to mention scrumptious

If anything is unclear, or if you have any questions, feel free to ask.
As you might have figured out by now, I love talking about baking.


Saturday, 12 March 2011

The First Truffle

I’m 11 years old. I’m in the kitchen, melting butter and fetching icing sugar from the top shelf. I cut a bar of chocolate into small pieces, just as it says in the instructions, and put them carefully in to the pot of melted butter. I feel like I’m in a science lab, combining different elements, working with various equipments and anticipating the result. I’ve been told that you can make your own chocolate balls (not yet learned the word truffle), that this is how it’s done. I blend all the ingredients together, pour the mixture into a small glass lasagna pan and place it in the fridge. Now I have to wait.
I take my dog for a walk down by the ocean. He likes wading in the water, never seams to mind how cold it is. Then we take the shortcut home, through the small forest and over the hill. It’s been over 45 minutes, its time to check on my batch. I ceremoniously put on my Snoopy apron and retrieve the pan from the fridge. I take a teaspoon and scoop out a piece that I place in my cocoa coated hands. With slow and careful movements, I roll the chocolate between my small palms. It’s a bit stickier than I anticipated, but it works! I manage to roll a perfectly round chocolate ball! I could scream with joy, but I know that mother is studying in the living room, not to be disturbed. My batch yields over 20 mini chocolate balls. They are supposed to be tossed in shredded coconut, but all I have is oats. That will do. I cautiously sprinkle oats over the truffles and place them on a small oval platter. It’s time to make some tea.

I no longer have the Snoopy apron and my hair is a bit shorter, but I still have the same sense of wonder when I bake. It doesn’t matter if it’s a new or old recipe. I never quite know how things will turn out, what it will taste like.
I’ve tried various truffle recipes over the years, they are all good. Some require more skills than others, but most of them are fairly basic. Let’s start with a simple one.

Terrific Truffles

240 g dark chocolate
120 g butter
2 egg yolks
120 g icing sugar
Pinch of salt
1 teaspoon vanilla
50 ml whipping cream (or half and half)

Melt the chocolate in a bowl over a pan of simmering water. Obviously you need a heat resistant bowl, not the wafer thin china kind. Once the chocolate has melted, add butter cut into cubes. Slowly stir until its all blended. Remove the bowl from the heat. Add egg yolks and sift in icing sugar and salt. Keep stirring. Then you add whipping cream and vanilla. The batch should be thick and glossy. In other words, quite tempting.

Put the preparation in the fridge for at least an hour. Its ready when you can form small balls in the palm of your hand without making a total mess. You can also pour the mix directly into little chocolate moulds. I have rose and heart shaped ones. Another option is to put the chilled truffle-mix in an icing bag and create rosettes and stars. One batch, many options.
Once you have created a multitude of truffle shapes, put them back into the fridge for a little while. You can stop right there, or you can take the extra step of rolling them in cocoa powder, shredded coconut, slivered almonds, milk chocolate shavings, use whatever you have on hand. In a pinch, you can even use plain old oats.

Happy baking!


Sunday, 6 March 2011

F is for Frosting

Frosting is tricky, or it can be. Burnt chocolate, grainy texture, overpowering butter flavour, not enough to cover the top and the side of the cake, the whole experience can leave you quite deflated. You might get the frosting right, but your cake could still end up lap-sided and unsightly. Is it any wonder that so many people simply buy cakes and leave the baking to the professionals? How many times have I butchered a layer-cake by cutting the layers uneven, messing up the serving platter with dripping frosting and fingerprints, and utterly failing to smooth out the top coat of the cake? Endless times I tell you, endless. But I never gave up. I always knew it was possible to create an inviting, tall, proud and perfect layer-cake. Yet all the recipes I tried always left out those helpful hints that would make this dream a reality. I guess the census is that if you are brave enough to try a recipe that requires more than your average cooking skills, you already know everything there is to know. No point being helpful or anything, just leave the baker guessing and frustrated.
The thing is, it's not that difficult. After all, we are  not entering a small town baking contest or trying out for a French pastry school (even though I would love to!) I simply want to bake a cake that doesn’t look like it belongs in the stage production of Rent.  
Of course, most people are thrilled beyond recognition whenever they are served anything home made, (you made that from scratch???), but don’t let this kind of admiration and enthusiasm slow you down. Aim higher, raise the bar, you can bake a cake and decorate it too. But before we get started, read and treasure the following tricks I’ve picked up along the way. 

Baking pan: Guess what? It turns out that the pan measurements they recommend in the recipes does matter. And here is why: If your baking pan is too big, the cake will not get as tall, and it can easily over-cook. A dry, thin, layer cake is just not worth it. And if the pan is too small, well, then the batter will overflow. So measure your pan.

Cutting the cake into layers: This part was always my downfall. How to cut the cake without reducing it to a ground zero zone with crumbs and uneven layers all over the kitchen counter? I tried a longer and sharper knife. I tried making a small insert along the side of the cake so I would know where to match up the layers again. I tried eyeballing it, good luck with my eye sight. The truth is, I was not getting anywhere. Sometimes I would get it right, sometimes not, there was just no telling. I needed an airtight technique, something I could always trust.   
Then one day I read about the ruler, and the power of patience. You take an ordinary ruler and carefully make little marks all around the cake, 1” or 2” high or however thick you want the layers to be. Then when you get ready to cut the cake, you will without a shadow of a doubt cut the layers 100% even, just follow the marks. What used to be the hair-pulling experience is now a faultless Zen moment. So easy, so simple, so brilliant.
Another advice, be realistic. If the recipe says to cut the cake into three layers, but your cake didn’t rise that much, be happy with only two. Sliver thin layers only fall apart anyways.

Frosting tools: A frosting knife and an icing bag, go out and get them. With one big swoosh the frosting knife will spread the frosting perfectly even and smooth. No spatula or regular knife could ever measure up. The icing bag, the fantastic icing bag will become your best friend. Do you want to make rosettes along the edge of the cake, draw an art deco pattern in the middle, or how about a nice border along the side? Try doing that with a spoon or some other medieval tool. Equipped with a frosting bag there are is no end to how pretty and professional your cake will look. It’s all about those finishing touches.

So what is the point of all of this? The point is to make you see that making a great cake, a layer-cake, is not only easy, it’s great fun. Once you get the hang of it nothing can stop you. You will find yourself making all kinds of patterns, experimenting with different frosting techniques, whipping up cakes and decorating them in no time.
Life is too short to eat tasteless (store bought), unattractive (home made with no skills), cakes, so get baking.

The recipe I have in mind today is from my dearest grandmother. She only makes it for birthdays or very special occasions. If I see this cake on the dessert table, I know its a particular important day. The cake is not very fancy, it doesn’t require any mystical ingredients or delicate equipment, but it is your classic, rich, timeless chocolate layer-cake.

 Grandma Inger’s Chocolate Cake
6 eggs
200g sugar                                                      Frosting
125g chocolate                                               120g butter
3 tablespoon butter                                         200g chocolate
120g flour                                                       400g icing sugar
1 tablespoon cocoa                                         A pinch of salt

Preheat the oven to 175ºC and line a 12” round baking pan with non-stick baking paper. Don’t worry about greasing or lining the side of the pan. You actually want the cake to stick to the side. This will prevent your cake from falling down after rising. My mother thought me that.

Beat eggs and sugar with an electric mixer on high speed until it has at least tripled in size, and the colour has transformed from pale yellow to almost white. This could take a while, so in the meantime melt chocolate and butter over low heat. While that is slowly melting, whisk together flour, cocoa and baking powder.

After the chocolate mixture has cooled down to room temperature, alternate between adding this mixture and the flour mixture to the foamy egg batch. Stir in between, it must all be evenly blended.   

Lovely, now pour your batter into the cake pan and bake for 45 minutes. As always, rotate the pan after 20 minutes, and check if its done after 30. Just insert a needle, or something similar, in the middle of the cake and see how it comes out. If its covered in drippy batter, the cake clearly needs to remain in the oven. If the needle is coated with moist crumbs, remove the cake from the oven and place it on a cooling rack. Leave it there for 10-15 minutes. Then take a small, sharp, knife and run it along the sides of the pan to release the cake. Turn the cake up side down, either by letting it rest in your hand or on a platter, and remove the bottom of the pan along with the baking paper. Put the cake back on the cooling rack and let it cool down for another 30 minutes or so.

I always like to make the frosting while the cake is baking. Then the frosting has time to set and cool down for when the cake is ready.
Melt chocolate and butter over low heat. When melted, add eggs and alt and stir until its all incorporated and blended. Add the icing sugar, a little at a time.  Whisk carefully until your frosting is smooth and shiny. (If for some reason you frosting is more dull than shiny, you can always add a tiny bit of milk or whipping cream. Another helpful hint they don’t tell you in the recipe books.)

Here is a confession. I always have a bit of extra chocolate or some whipping cream on hand when making this kind of cake. Why? Because I know there is a real chance of running out of frosting. In order to stretch my batch, I can melt more chocolate or whip up some cream and mix it in with the left-over frosting. Either way, the result is often that it looks like I’ve made 2 or 3 different frostings, quite impressive. There is a dark frosting for the layers, then a lighter frosting for the outside of the cake. The trick is always to make your mistakes look intentional. I learned that when sewing, but it also applies to baking.
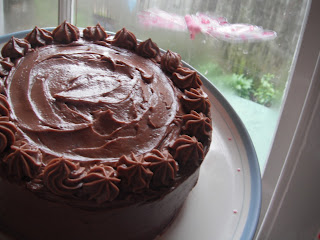
Now, get out your ruler and make small, but visible, marks all around your cake. If you are cutting it in 3 layers, you can make marks for both cuts at the same time. Cut your cake by following the marks, and put your layers carefully down on separate plates. First you put a blob of frosting on the bottom layer of the cake. With your icing knife spread the frosting evenly. If your frosting isn’t even, the cake will end up uneven, so it’s important to get this right from the beginning. Then you take the second layer of the cake and place it on top of the frosting. Spread frosting on this layer as well. At last, place the top of the cake on that layer of frosting, and now we move on to the decorating part.

To coat the top, place a blob of frosting in the middle of the cake and spread it (with your frosting knife of course) out to the edges. You might spill some over the edge, let it be. Then spread a thing layer of frosting all around the side of the cake. Put the cake in the fridge for 10 minutes. Once the frosting is set it will be easier to add the second coat, and it will also prevent crumbs from getting into the mix. Apply the second coat of frosting to top and side. Like before, coat the top first, then the side. Take your time, no point in rushing it. As you will notice, a ridge will form along the edge where the top and the side meet. Hold the icing knife at an angle and smooth the ridge towards the centre. Easy does it. Rotate the cake and repeat until the ridge is gone.
Put the remainder for the frosting in an icing bag (with the star nozzle in place), and make little flowers along the edge of the cake. You might want to practice on a plate first.

See! That wasn’t so hard! It just takes time, but its not difficult. Who’s the Domestic Goddess now?

Friday, 25 February 2011

Coca-Cola Cake


We all need a friend from the South, a good friend. Someone who can tell us cute anecdotes from the filming of Gone with the Wind (1,400 candidates were interviewed for the role of Scarlett O’Hara), who can say y’all without sounding like a idiot, and who has a treasure box full of rich and mouth-watering recipes. I’m talking recipes so sinful that they would terrify and haunt the low-carb, non-fat, soy-addicted inhabitants of the West Coast. Deep fried okra, lemon meringue pie, skillet cornbread, pecan-peach cobbler, and rosemary catfish, just to mention a few.

It was after lunch, and I was sulking at my desk. I awoke from my depressed slumber when all of a sudden my friend  rushed in to the office. Her ponytail was askew, she was wearing my favourite Terminator t-shirt and carried an oversized baking pan. This could only be good. To my surprise she put the pan down on my desk and whipped out a giant bread knife. “I heard you only got ice cream, so I baked us this cake.” She was right. I had only gotten ice cream.  We were all supposed to get cake on our birthdays, but the management had decided we were too busy to get me a cake this year. Instead I was given a tiny little ice cream. Emphasis on tiny, and not even chocolate flavoured. “The cake is still warm, so the frosting might be a bit runny.” Frosting! Cake! Chocolate cake! I was so happy. Only a true Southern friend would comprehend the importance of getting a birthday cake, and that no miniscule ice cream could ever replace it. I helped myself to a giant piece, and soon my other colleagues were gathered around, longingly awaiting their share. Not only did we love the cake, but we were so very thrilled to have our own secret cake party. I guess there is something to forbidden fruit, or cake for that matter. And the cake, the cake was the famous Cracker Barrel Chocolate Coca Cola Cake.  Never heard of it? Neither had I, but it only took me one bite to make me realize I’d been missing out. Ever since that birthday I have been stuck on this cake like white on rice.

When you feel ready to embrace you inner Southern girl, or boy, follow the recipe below.

Coca Cola Chocolate Cake

Finally a recipe for the metric readers!                                                           

225 g butter
3 tablespoon cocoa
50 g melted dark chocolate
2 dl coca cola (isn’t this fun!)
2 big eggs
1 teaspoon vanilla extract
4.5 dl sugar
1 dl buttermilk
1 teaspoon baking powder
4.5 dl flour

Frosting:
100 g butter
50 g melted dark chocolate
1 teaspoon vanilla extract
6 tablespoons coca cola
500 g icing sugar

Preheat the oven to 170ºC and line a baking pan (approximately 20x30 cm) with baking paper.

Melt butter and chocolate together, then add cocoa and coca cola and give it a good stir. (It might fizz and bubble a bit, just like a magic potion.) Whisk together eggs and vanilla, add sugar and buttermilk. Then you stir inn flour and baking powder. Add all of this to the butter/coca cola mixture and give it a good stir. 
This batter will be on the thin side, it’s not a hefty thing that you have to scrape out of the baking bowl with force and determination. I’m just mentioning it, just in case you feel tempted to add more flour. Don’t.

Pour (with ease and grace) the batter in to the baking pan and bake the cake in the middle of the oven for 40 minutes. Rotate the pan halfway through, in case you have one of those temperamental ovens that don’t cook things evenly.

When done baking, take it out of the oven, but leave the cake in the pan.

While the cake is baking away, make the frosting.

Melt butter and chocolate over low heat. When melted, add cocoa, coca cola and vanilla. Then you add the icing sugar and stir until its all nice and even.

When the cake has cooled down for perhaps 15-20 minutes, pour the frosting over it while its still in the pan. Most cake recipes require that you cool down the cake first, and then you deal with the frosting and the decorating part. However, by doing it this way the frosting seals in the moisture and ensures that the cake remains, well, moist. In addition this will allow some of the frosting to seep into the cake. Devine.

Put the cake in the fridge until the frosting has firmed up, then its ready to be enjoyed and eaten.  Or, if its an emergency, like it was on my birthday, serve it right away. Just warn your guests that it might get a bit messy.


Thursday, 17 February 2011

Bella Biscoctus

How we relate to food, and who eats what when, has changes a lot over the centuries. Queen Elizabeth 1st  drank strong, dark ale, for breakfast (no protein shake for this monarch), George W. Bush banned broccoli from the White House, and biscotti used to be the staple food for the Roman Legion. Not because this dry cookie went so well with their flask of latte, but because it had a long storage life. Still has. Biscotti is Italian for “baked twice”, and that is exactly what you do. First you bake it as a loaf, and then you slice it up and bake it again. It’s delicious, scrumptious, and you can tweak the recipe to add almost any flavour you like. Guess which one I adore the most?

Chocolate-Honey-Lavender Biscotti

You didn’t expect that! You thought it would be a pure chocolate galore fest. But no, I like to use other flavours as well. After I discovered lavender sugar at Waitrose, I’ve been looking for any excuse to use it. It’s great for shortbread, but that is another recipe. Now on to our Roman treats.

Note: if you don’t have lavender sugar, just add some dried lavender blossoms.

2 ¼ cups white flour
1 teaspoon baking powder
½ teaspoon baking soda
¼ teaspoon salt
1 cup lavender sugar 
3 large eggs
3 tablespoon honey
3 tablespoon pine nuts
½ cup toasted almond flakes
½ vanilla extract
100 g dark chocolate

Adjust the oven rack to the middle position and heat the oven to 350 degrees. Put on your apron and your Dean Martin CD, and let the baking begin.

Whisk together all the dry stuff except for the sugar, and set aside. This includes the nuts and the almonds as well.

In a big bowl, whisk together the sugar and the eggs. Then you stir in the honey and vanilla. Sprinkle the dry ingredients into the bowl, and fold the two mixes together until just combined. This batter may appear sticky, but resist the temptation to add more flour. We want a light and crisp result, not dense and heavy.

Put the dough on the table and divide it in half.  Put the halves on a lined baking tray, and quickly shape the dough into loafs. Make sure your hands are coated with flour; it will help with the stickiness. Or, use a rubber spatula. In either case, you want the lovely loafs to be approximately 12 x 2 inches each. 
Put the tray in the oven and bake for 35 minutes, or until they appear golden and begin to crack at the top.

Take the tray out of the oven and let the loafs cool for 10 minutes. Lower the oven temperature to 325. When the 10 minutes are up, use a wide metal spatula to transfer the loafs on to a cutting board. With a serrated knife cut both loafs diagonally into thin slices. They should be thinner than a slice of bread, but wider than a cracker. One time I forgot to slice diagonally and just sliced away in a straight line. The biscotti ended up looking so plain and dull; the diagonal cut really adds something. Anyways.

Lay the slices on a baking tray and bake for 7 minutes. Turn them over and bake for another 7 minutes. When done baking, transfer them to a wire wrack and let them cool.

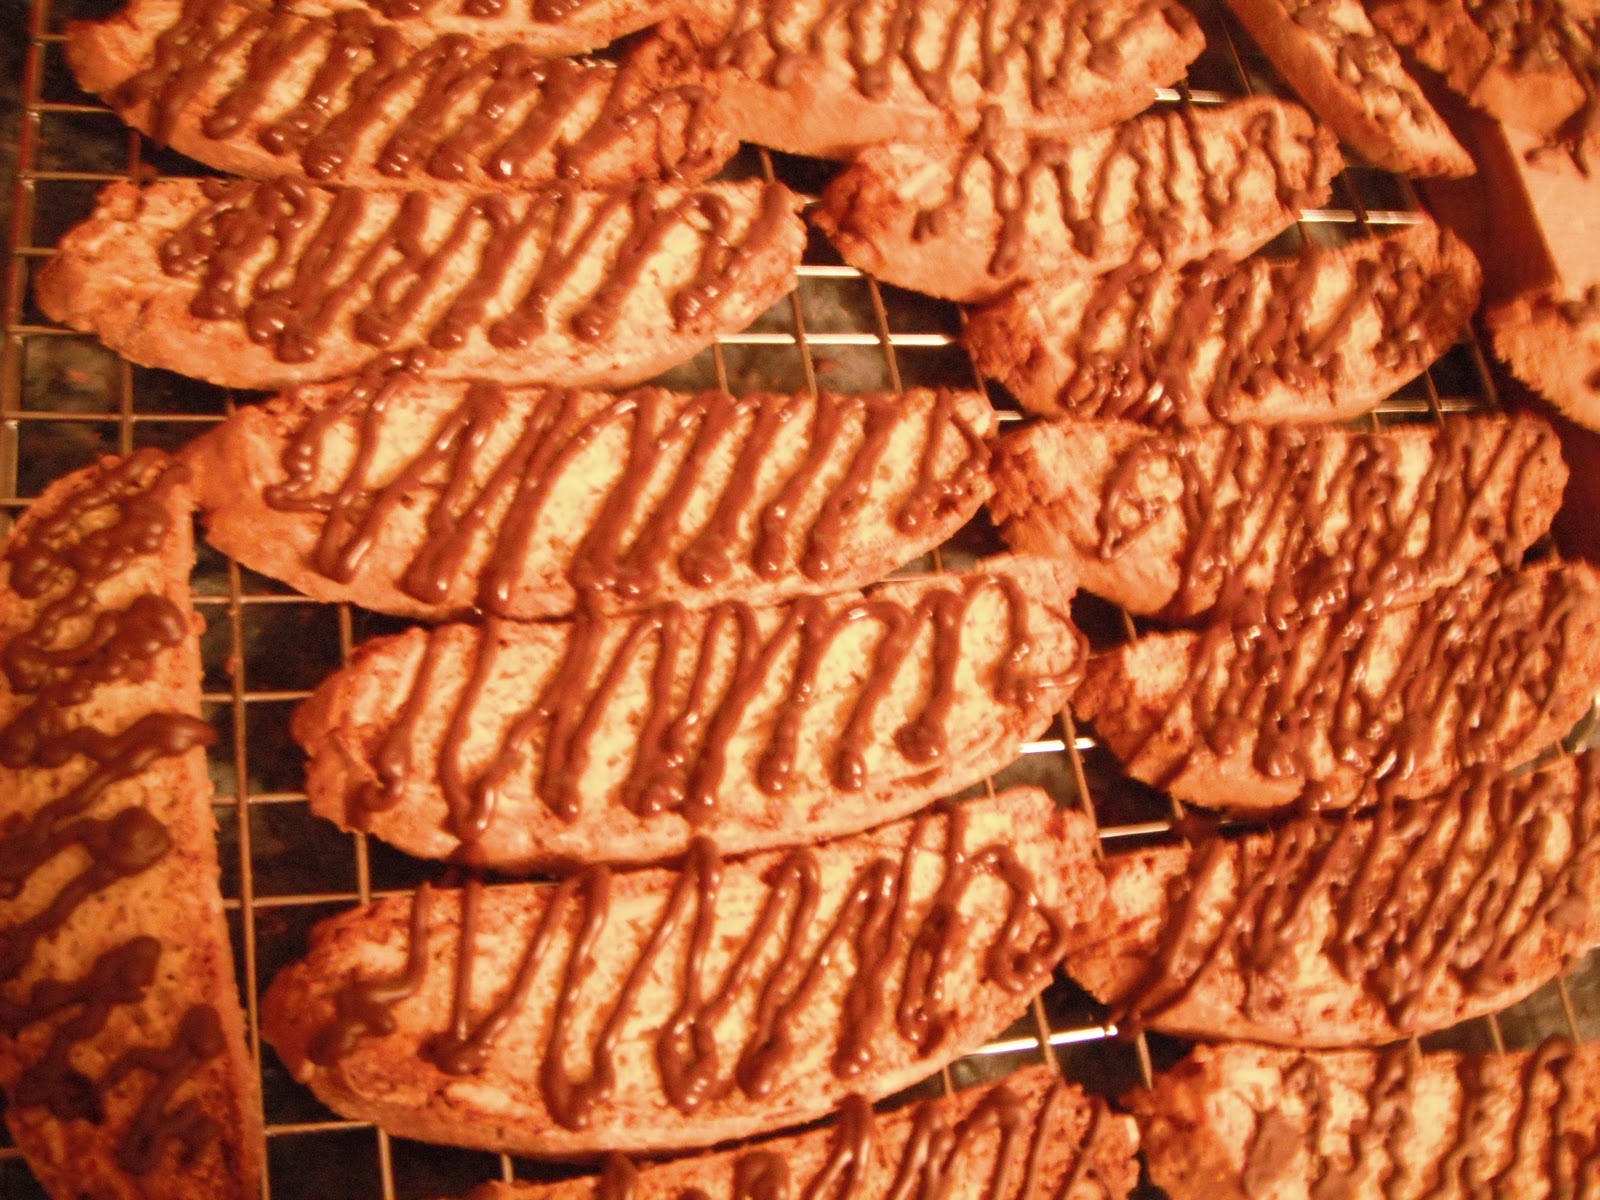
Melt dark chocolate and pour it into an icing bag. A plain zip-lock back will also do. Cut a tiny slit in one corner of the bag so the chocolate will come out in a thin line.
Create a zigzag pattern on each biscotti, or draw any pattern you prefer. This one is just so easy, and quick to do with this many cookies.

If you can handle the wait, don’t eat the biscotti until the chocolate has hardened. If you can’t wait, don’t burn yourself on the hot chocolate.

Biscotti can be stored in an airtight container for about a month, but I seriously don’t think there will be a need for that.

Monday, 7 February 2011

I like cheese and I like cake


I am not very athletic, to put it mildly. I love walking, swimming, biking, and I always take the stairs instead of the elevator. It’s just that the concept of dressing up in spandex in order to sweat in public is totally lost on me.
My PE teacher wrote in my school report: “Inger is fonder of making flower crowns than participating in running and team-sports.” You bet.
However, when I read that the Greek athletes were served cheesecake during the very first Olympic Games back in 776 B.C, I suddenly found myself motivated to throw a disk or two.

I asked a friend if he liked cheesecake and got the reply: “Well, I like cheese and I like cake.” With that line of logic in mind we move on to my next recipe; chocolate cheese cake. Yes, I do like chocolate and I do like cheese. 

This cake is very easy to make, and it looks really impressive. People will think you have attended some advanced cake-decorating class, when in fact all you did was swirl some melted chocolate about with a soup spoon. You’ll see what I mean, just follow the recipe below.

Chocolate Cheese Cake

You need:

225 g Digestive biscuits (or shortbread, chocolate chip cookies, graham cracker... Up to you really)
100 g melted butter
750 g cream cheese
¼ cup sour cream
3 eggs
1 ¼ cups sugar
2 teaspoons vanilla extract
75g dark melted chocolate

Preheat the oven to 350.

Throw the biscuits in a food processor and pour in the melted butter. Pulse until blended. If you don’t have a food processor, don’t despair. Crush up the biscuits and put them inside a sealed, clear bag. Get out a rolling pin and roll it over the bag until you have fine crumbs. Put this in a bowl and stir in the melted butter. See, easy, just how our grandmothers used to do it.

Butter the bottom and side of a 9-inch springform pan, and empty in the crumb/butter mix. Press until it’s an even layer. Bake for about 13 minutes, or until the sides start to brown. Pre-baking the crust will prevent it from becoming soggy when you pour the batter over it.

Place cream cheese in a bowl of an electric mixer and beat with medium speed until the cheese starts to look smooth. Stop the machine, scrap the mixer blade and the side of the bowl, and then restart the mixer. Repeat this a few times. There is a reason for this repetitive instruction, namely a silky smooth batter. Ever tried a lumpy cheese cake? No thank you. So mix and scrape, mix and scrape until all lumps are far gone. Once you have added the eggs it’s too late, so it’s now or never. Once smooth, you gradually add the sugar. Then add vanilla and one egg at a time.

Now, take out one cup of this every so lovely batter and set aside. Pour the remaining batter over the pre-baked crust.  
Melt chocolate and mix it in with the reserved batter. It looks really lovely, and tastes good too. Pour the chocolate batter on top of the plain batter, about 1inch from the pan edge. This doesn’t look like very much. Simply a regular cheesecake with a chocolate ring, big deal. But wait a minute, get out your soup spoon and be prepared to be amazed. 

Are you ready? Drag your spoon through the 2 batters in order to make a beautiful, marbled effect. Scoop the spoon back and forth, in circles, straight lines; you decide what kind of pattern you want. Just don’t go so berserk that you totally blend the 2 batters together. It will still taste incredible, just not look as nice. Isn’t it pretty? 

Reduce the oven temperature to 300 and bake the cake for about 50-60 minutes or until  it shows signs of puffing around the edges. Just keep an eye on it. If you overbake the cake, the eggs in the batter can coagulate too much and will pull the cake apart. In other words, your cake will crack and mess up your marble design.

When done baking, remove the cake from the oven and run a knife around the edges to release the cake from the pan. This little step will prevent the cake from cracking during the cooling down process. These cheese cakes are temperamental beings, but as long as we handle them correctly, all will be fine. Place the cake on a cooling rack and put a large, inverted, mixing bowl over it. Don’t ask. After an hour of the inverted bowl treatment, put the cake in the fridge for at least 2 hours. A cheesecake that is not chilled properly will not hold its shape when sliced. So hold your horses a little longer, be patient. 

Here is a hot fact for you to ponder while you wait for your cake to cool down:
Because chocolate’s melting point is just below your body-temperature, it does in fact melt in your mouth. This raises your brain activity and heart rate more intensely then when you kiss passionately. Not only that, it lasts four times longer. 

Whomever said that chocolate is bad for your obviously didn't like kissing either.